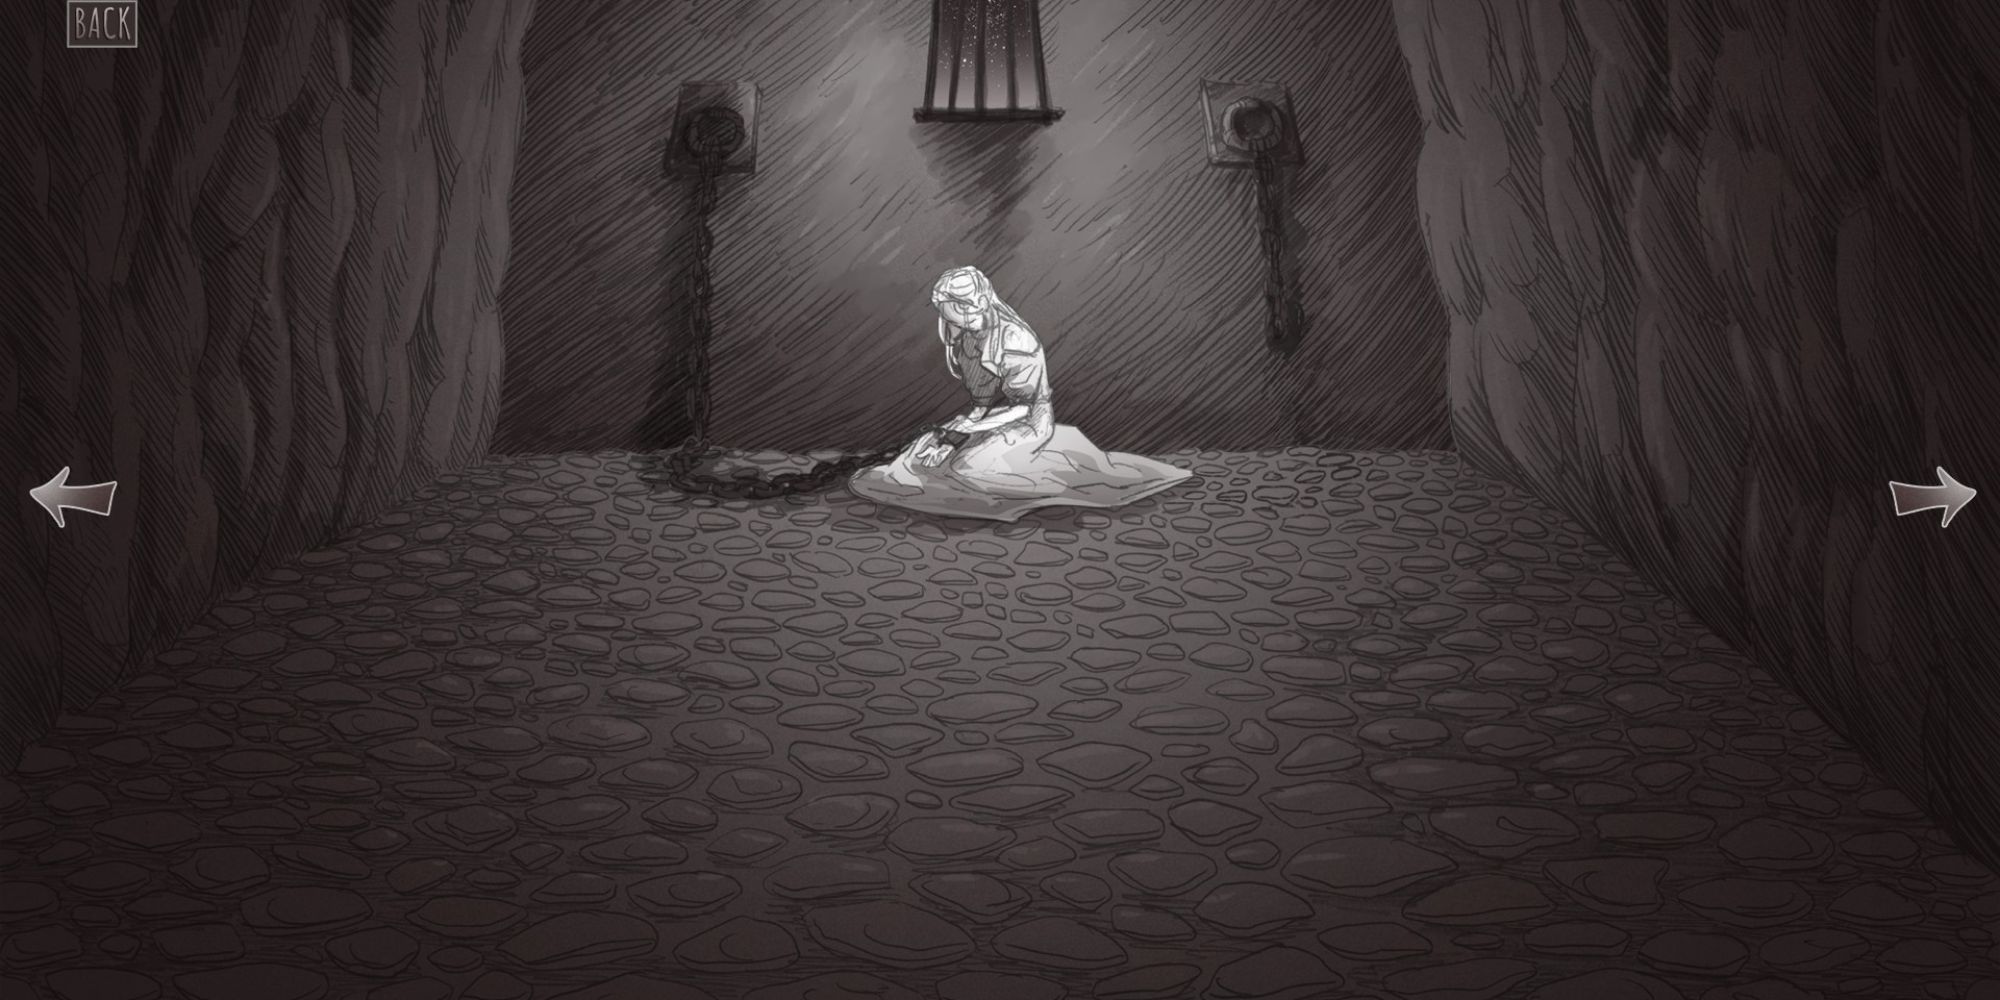
With the release of the new Pristine Cut update, Slay the Princess adds more routes and new endings, expanding more on preexisting paths.
There is no doubt that Slay the Princess is a narrative masterpiece. With dozens of winding and twisting paths, this terrifying visual novel devolves into more terrifying storylines with each time loop.
As a psychological horror game, Slay the Princess plays into the fear of the unknown, as the Princess can undergo terrifying and unsettling transformations in each chapter.
Very early on in the game, you are tasked by the Shifting Mound, a nascent eldritch god to collect Vessels–different versions of the princess who will shape the entity to its fullest potential.
You can collect a maximum of five Vessels per playthrough, and the in-game gallery, known as “Memories,” even provides hints on how to find these Vessels and their respective moments.
You’re reading this most likely because you want to see every possible path, or you’re achievement hunting. Before you make any decision, make sure to make a clean save so that you can easily return for a different path.
Warning: This article contains MAJOR SPOILERS to every possible path in Slay the Princess.
RELATED
10 Underrated Indie Horror Gems
As Halloween draws closer, it’s a great time to explore underrated horror gems, including games. Here are some indie games that could use more love.
A Being Of Perception

Before we get to each vessel, I’ll first describe a basic rule of thumb that can help guide your playthroughs.
As is hinted at throughout the game (Last warning: SPOILERS!), the Princess is a being of change. Her form and personality change based on how the player character’s perception of her, dependent on who or what you think she is capable of.
Grabbing the blade before entering the basement means you perceive her as a possible threat, so she will become cold, distant, and distrusting. In contrast, entering the basement unarmed renders her friendlier and more innocent.
With every time loop, the Princess undergoes a dramatic transformation based on your perception of her. The more scared of her you are, the more monstrous and terrifying she becomes.
Each path to the vessel tells a unique, introspective story, and no matter whether you resolve to slay the Princess, you’ll still get an interesting story out of it.
The Adversary

The Adversary is the epitome of stubbornness. She’s practically unkillable–stronger, faster, and more resilient than most other variants.
To trigger the Adversary path in Chapter 2, you’ll need to make the Princess want to fight you by talking to her while still believing she’s dangerous. Here are the choices you’ll have to make:
- Take the Blade.
- Make sure you Tighten your grip.
- Choose the dialogue option “I’m not dropping the blade.” Make sure you stand your ground.
- Slay the Princess and finish the job.
In this path, you can give her the fight she desires, run away (like a coward), or become a pacifist. Either way, you’re in for a formidable foe who won’t hesitate to beat you to a pulp.
This path can either end here or further branch out to Chapter 3 through the following:
- Putting up a poor fight or fleeing will trigger the Eye of the Needle path.
- This is one of the many paths that may lead to The Fury, as long as you anger her by either not fighting her, or dying horrifically to her violent onslaught.
The Tower

The Tower is encountered when you lose your will to slay the princess, which instills in her next incarnation a dash of godhood and a tinge of a superiority complex.
- Take the Blade.
- Confront the Princess. Regardless of your actions, make sure you Drop the Blade.
- Once you’ve exhausted the dialogue options, Slay the Princess.
- When she fights back, Give up. She’ll kill you, and trigger the Tower path.
By transforming into the Tower, the Princess becomes a domineering figure, viewing you as a lesser being whose only purpose is to serve her.
She is perhaps one of the most powerful Chapter Two forms the Princess can take, capable of forcing the Narrator out of your head and making you do everything she wants.
The Shifting Mound can claim her here, or she can become much more:
- Surrendering to the Tower will lead to the Apotheosis route.
- Defying the Tower will lead to the Fury route.
The Spectre

This variant takes the form of a ghost because you’re convinced she’s dead after you’ve slain her.
- Enter the Cabin. Take the Blade and then Enter the Basement.
- Confront the Princess. Select [Steel your nerves and step forward], then [Slay the Princess] without making ANY small talk.
- Don’t retrieve the blade OR examine the princess. Simply leave the basement.
The Spectre’s path opens up when you do exactly what the game tells you to–Slay the Princess. But the Narrator rewards you with eternal nothingness, so you take the blade to yourself. Everything goes dark, and you die.
When you return to the cabin in Chapter 2, you’ll find the Princess long dead, the blade still pristine. You’ll then find the ghost of the Princess lingering near her corpse, and now you can choose to do whatever you want to do with this path. You can either let her possess you or upset her, which could branch off into differing ghastly paths.
You can give the Spectre to the Shifting Mound by leaving the Cabin with her. You can also further the Princess’s transformation in Chapter III by doing the following:
- Slay yourself while possessed by the Spectre. This triggers The Princess and the Dragon route.
- Be killed by the Spectre. This triggers The Wraith route.
The Nightmare

If you try to leave your Princess-slaying job unfinished, she becomes a vengeful, nightmarish entity whose very presence can cause sheer heart-stopping terror.
There are a total of four opportunities to leave the Princess in the basement, each with minor dialogue differences. Make sure you’re doing the following:
- Descend into the basement regardless of whether you have the blade.
- Once you do, exhaust all dialogue with her. If you have the Pristine Blade, drop it before you talk to her, or else she won’t talk to you.
- Once all dialogue is exhausted, choose “Okay, we’ve talked enough.”
- Then, choose to keep her locked away.
- Commit to leaving her in the basement by choosing “No, we’re sticking to the plan…”
- Now the Nightmare route is triggered. Choose whatever option you want.
As the Nightmare, the Princess has a terrifying aura, capable of literally scaring you to death just by being close to you. Thankfully, with the Voice of the Paranoid in tow, he keeps you just barely alive with a useful grounding chant.
But if you explore the Nightmare’s route even more, you’ll discover that she’s a sad, lonely doll whose fear of abandonment has caused her to lash out.
- If you try to kill the Nightmare, you’ll trigger the Wraith path.
- If you remain with the Nightmare or try to run, you’ll trigger the terrifying Moment of Clarity path.
The Razor

The Princess is unpredictable precisely because she becomes whatever you think she is. If you kill her but second-guess yourself, she’ll stab you and you two die together.
There is more than one way to reach the Razor, but here’s the most guaranteed route in Chapter 1:
- Take the Blade.
- Confront the Princess and slay her.
- Once she’s dead, doubt your success. Choose either “I’m not sure…” or “Of course not…”
- Choose [Remove the blade] or [Check for a pulse].
- The Princess will stab you, and you die together, leading to Chapter 2.
The Razor is the epitome of sadistic joy, taking pleasure in killing you as many times as she can. There’s no malice nor anger, just the desire to sate her boredom by slicing you to ribbons.
The Razor is one of the only two Chapter 2 forms with a singular path, and perhaps the only form leading to a unique Chapter 4.
The Beast

The Beast is a transformation that manifests if you attack the Princess but give up midway through the fight.
Through her desperation for survival, she becomes like a cornered animal, and your changed perception of her transforms her into exactly that. Here’s one of the two routes to get to the Beast:
- Enter the basement without the blade.
- Confront the Princess and examine the chains.
- Exhaust all dialogue options until the Princess gnaws her arm off.
- The Blade will drop to the basement. Pick it up.
- Slay the Princess.
- In the middle of the fight, when the option is available, give up.
- Everything goes dark, and you die.
The Beast is an animal driven only by her desire to consume you. While she is capable of speech and will taunt you, she cannot be reasoned with, and she will do whatever it takes to devour you to escape the basement.
When you confront her in Chapter 2, she will stalk you like a predator, invoking a primal fear that has been with our species since time immemorial.
The Beast can evolve into one of two forms:
- Fighting the Beast and dying will lead to the Den. You’ll need to take the blade with you if you want to have that option.
- Getting eaten and digested by the Beast will lead to the Wild.
The Witch

Despite your initial intentions to free the Princess, you betray her by driving the knife into her back. Hurt by your sudden treachery, the Princess reincarnates into the Witch, a feline form who is equally sly and distrustful. Here’s how you can unlock the path to the Witch:
- Enter the basement without the blade. Make whatever choice you wish on the way down.
- Examine the chains when you meet the Princess. Exhaust all dialogue options when your character tries to leave the basement.
- Slay the Princess.
- Finish the job.
In Chapter 2, the Witch is a conniving, bitter opportunist who harbors resentment from your betrayal. Whether you choose to try and make amends or continue to kill her, the Witch proves to be as playful and sneaky as a cat, and will not hesitate getting hurt just to see you suffer. The Witch can lead to two other paths:
- If you betray the Witch or let her betray you while leaving the basement together, the Shifting Mound will eventually claim her.
- If you choose to try to make amends by giving her the blade, it will unlock the Thorn path.
- If you choose to leave and abandon the Witch, then she’ll control the roots of the cabin to crush and kill you both. This unlocks the Wild path.
The Stranger

If you decide not to engage in the story at all and try to do your own thing, you’ll inevitably break the world, creating strange and perplexing geometry that fractures into infinite possibilities.
Your refusal to stick to the script transforms the Princess into the Stranger.
- Whatever you do, do not agree to enter the cabin at the start of Chapter 1.
- Keep avoiding the cabin until you see an endless horizon of cabins, and the world ends, leading to Chapter 2: The Stranger.
What makes the Stranger’s chapter scary is that it’s unsettling and uncanny. The Princess is a horrifying amalgamation of multiple different versions of herself fractured and molded together.
Thankfully, this path is a pretty linear one, as you only need to play through this once to get all the achievements related to this Princess variant before the Shifting Mound claims her.
The Prisoner

A version of the Princess who is composed and pragmatic, the Prisoner is encountered after she is forced to kill you to escape. This version is patient and accepting of her situation, showing no hostility or malice, but is also willing to do whatever it takes to survive. To unlock the Prisoner’s path, you’ll need to do the following:
- Take the Blade.
- When you confront the Princess, drop the blade and talk to her.
- Exhaust as many dialogue options until you get the option to examine the chains. Try to save the princess.
- When the narrator forces you to slay the princess, scroll through the list and find “Warn her” and “Resist.” Doing so will let her know that you’re not in control, and she’ll swiftly put you out of your misery. You’ll then be carried over to Chapter 2: The Prisoner.
As the Prisoner, the Princess is more cynical and serious, speaking more bluntly and honestly, though her humorous side is still hidden beneath her cold exterior.
- If you let her decapitate herself, you’ll have the option to take her head with you out of the cabin. Taking the head with you will let the Shifting Mound claim her.
- If you leave it in the basement and exhaust the dialogue options, you’ll get to Chapter 3: The Cage.
- If you so much as try to hurt the Prisoner or cross her boundaries, she’ll turn into The Drowned Grey.
The Damsel

Nothing like a good cliché to complete any fairy tale story with Princesses and Heroes, right?
Befitting the name, the Damsel is a dainty variant of the Princess who is sweet, helpless, and ridiculously optimistic. Her pliant heart makes her a people-pleaser, and will ignore her own feelings as long as you’re happy.
To get to the Damsel, you’ll simply need to follow the same steps as you would for the Prisoner, except you don’t take the blade when you enter the basement in Chapter 1.
This version of the Princess is much more pleased to see you, even calling you her “dashing hero.” Because this Princess is a people-pleaser, she’ll do whatever you want to do as long as it makes you happy.
- If you slay the Princess, she’ll die happily for you and will unlock The Burned Grey.
- If you show your heart to the Damsel and decide to stay here forever, it’ll lead to one of the best-written paths – Epilogue: Happily Ever After.
The Eye Of The Needle

Like the final evolution of a Pokémon, this Princess variant is a much stronger, more powerful version of the Adversary, as her demonic or draconic features are much more pronounced.
Her burning heart yearns for an eternal cycle of combat, and she is ready to pummel you into next week. The only way to trigger this path is to put up a poor fight or run away from her.
- In Chapter 2, take the blade.
- You don’t want to fight her, so instead you turn around and leave.
- She gives chase, so run like hell. She kills you.
This muscular demon is even more eager to fight you and will chase you to the ends of the earth if it means having a good fight. Engage her in a bloody dance of blades and fists until the Shifting Mound claims her.
The Fury

The Fury can be transformed from either the Adversary or the Tower and is the goriest route of all, complete with body horror and existential dread of the Ship of Theseus paradox.
- From the Tower route, keep picking options that defy the Princess and injure her, forcing her to hit you back.
- From the Adversary route, try to fight the Princess unarmed and let the Voice of the Stubborn insist that you keep getting up. Keep dying until she ends you for good.
No matter what you do, the Fury will unravel you into gory ribbons and atomize you into oblivion. Her violent desire to destroy you is born from her hatred of you, as she blames you as the source of her agony.
The Apotheosis

The Tower may be powerful, but she’s only a fledgling deity. After asserting her dominance on you by forcing you to kill yourself, she undergoes an apotheosis and becomes a true god, towering above everything.
Here’s how to help the Princess reach her true godly potential:
- Before confronting the Tower, make sure to take the blade.
- Initially defy the Tower by saying “I’m not going to help you…”
- Then choose [Slay yourself].
This path is very reminiscent of JRPGs where you kill a god. How could a bird like you ever hope to lay a finger on a god?
The Princess And The Dragon

Have you ever wondered what it’s like to be the Princess? To her, you’re a scary birdman who’s constantly trying to kill her. What if you saw things from her perspective?
- Follow the steps to reach the Spectre.
- Before entering the basement, take the blade.
- When speaking with the Spectre, let her possess you.
- With the Princess still inside you, slay her.
By slaying yourself with the Princess still inside you, you somehow merge with the Princess, inhabiting her body while the rest of your Voices pilot your body.
This chapter also has a pretty light-hearted fourth wall break, as you and the Princess both acknowledge the title cards that appear before each chapter.
Through her eyes, you’ll see just how disorienting it can be to be both dead and alive at the same time. Not only that, you get to witness the player character’s true form.
The Wraith

If you’ve upset the Spectre, she kills you, forcing the next Chapter to begin.
- Follow the same steps to reach the Spectre.
- Take the blade before confronting the Princess’s ghost.
- When confronting her, slay the princess.
- That didn’t work. Slay the princess harder. Make whatever choice next and then die.
As the Wraith, the Princess is angry at your refusal to give her what she wants, so she decides to become a vengeful spirit to take what she is owed.
She’s much more ghastly-looking, has much more malice, and forces you to do her bidding by possessing you. You can either relinquish control or fight back, remaining stubborn and throw yourself into oblivion.
The Moment Of Clarity

This route can only be reached through the Nightmare variant of the Princess. When you confront her in Chapter 2, refuse to free her. She’ll then force the player character, every voice, and the Narrator to see all the suffering she’s undergone throughout these cycles.
Chapter 3 pops up, then 4, then 5, and the entire screen fills with an almost infinite number of subsequent chapters. You lose count of how many loops you’ve been in, and you enter the Moment of Clarity with additional voices who remember what happened aside from you.
This version of the Princess is one of the most terrifying, as she becomes akin to an eldritch horror. Her force of will is so overwhelmingly powerful that even the Voice of the Hero, who is usually optimistic and brave, sounds broken.
The Den

Driven purely by instinct and no longer a sentient creature, the Princess is a much larger and more formidable beast, living in a dark cave in the cabin’s basement.
- Follow the steps to reach the Beast.
- Make sure to take the blade.
- When confronting the Princess, you’ll be prompted to act or speak. Don’t waste time. Move.
- Select two (Explore) dialogue options next.
- Survive the Princess’s onslaught.
- You can either choose [Stay. Alive] or [Wait for her to strike, and hit her back]. You’ll unlock a different achievement and path for each choice in the next Chapter.
- The Princess consumes half your body, and you die, leading to Chapter 3.
This variant of the Princess is incapable of speech or higher reasoning, as she has become nothing more than a monster who lives to prey on little birds like you.
When trying to get different results from the Den, make sure to be consistent with your choices from Chapter 2. If you picked up the blade in Chapter 2, then you’ll need to do the same in this chapter, or else the Shifting Mound will claim her prematurely.
The Wild

The Wild is a variant of the Princess that can split into two slightly different variants. You can reach the Wild in the third chapter via the Witch or the Beast in Chapter 2.
The following paths also have multiple but similar branching options to take, though that is ultimately up to you, as long as the Witch kills you with the cabin’s roots or the Beast swallows you whole. Here is the most straightforward path for each Chapter 2 variant:
The Witch:
- Regardless of whether you take the blade, confront the Princess.
- Leave the Princess in the basement.
- She will then trap you with the cabin’s roots.
- Give up, and await your death.
The Beast:
- Confront the Princess in the basement regardless of whether you’ve taken the blade.
- No matter what you do, get swallowed whole by the Beast. Simply remain still.
The Wild is the interconnected network of everything: the woods, the cabin, the ground. You and the Princess have merged to become a singular entity.

Once you exhaust all dialogue options, you’ll be met with a choice between [Gaze at the hatred in your heart] or [Bury it. Now. Before it’s too late]. You’ll need to decide whether you accept your unity with the Princess or reject her.
By focusing on that hatred, you separate from the Princess and see that she’s fused with a tree trunk in the form of the Wounded Wild, allowing you to either free her or slay her.
However, if you ignore that feeling and embrace the Princess, you’ll get the Networked Wild and might come across some pretty shocking revelations about this time loop both you and her find yourselves in.
The Thorn

The Witch
- Follow the steps to get to the Witch.
- Before entering the basement, take the blade.
- Make whatever choices on the way down until you confront the Princess.
- When presented with the option, pick the option to [Give her the blade.]
- Lock in your decision by clicking it again.
- OPTIONAL: Tell her, “You’re beautiful. I want to actually save you, and this feels like the only way to do it.”
- She’ll stab you in the heart but immediately regrets it. You die, beginning Chapter 3.
You and the Princess try to find a way to end the cycle of violence that you find yourselves in. By initiating this truce between you two, she transforms into a version who is stuck in a prison of hostile vegetation, epitomizing the common phrase “hurt people hurt people.” In her hands is the Pristine Blade.

She’s not going to trust you that easily and is skeptical that you might try to hurt her again. Calling her beautiful in the previous chapter may also open up a romantic scene between you two. If you want to kiss the Princess, here are the dialogue options you should pick:
- When descending into the basement, choose, I just want to talk. Really talk. Then proceed down the stairs.
- Once you meet the Princess, she will ask you if you’re here to laugh at her. Say “I’m not here to laugh. I’m here to free you. If you’ll let me.”
- The Princess wants to trust you, so you’ll need to be gentle with convincing her. Say “You’re not the only one who yearns for freedom. I’m as trapped as you are. I think we need to leave together.”
- Exhaust the top-most dialogue options. “Is there nothing I can say to change your mind?”
- One last push. “Then maybe it’s past time for either of us to say anything. All that counts is action.” [Reach for the blade.]
- The Princess now trusts you. Cut her free.
- Finally, kiss her. Congratulations, you’ve romanced the Princess!
The Cage

Despite her cool exterior, the Princess is unfortunately unable to keep her head when she tries to free herself with the blade you’ve given her. Here’s how you can get to Chapter 3: The Cage:
- Follow the steps to reach the Prisoner.
- Take the blade before entering the basement.
- Respect the Princess’s boundaries by sitting where she asks you to sit.
- Exhaust all dialogue options until she asks for your blade.
- Agree to give her the blade. She’ll then cut her head off.
- After the Princess’s self-inflicted decapitation, leave her head in the basement and try to exit the cabin.
- Because she’s dead, you won’t be able to leave. Use the blade to slay yourself.
- You’ll then enter Chapter 3: The Cage.
As the direct incarnation of the decapitated Princess in The Prisoner, this variant has become a passenger to her own actions, forced to watch her body act while her head is trapped in a cage.
The Grey
Like the Wild, the Grey is a Princess variant that can split into two versions depending on whether you slay the Prisoner or the Damsel.

The Drowned Grey:
- Complete Chapter 1 by following the steps for the Prisoner path.
- Before entering the basement, take the blade.
- Make whatever choices you want, then slay the Princess.

The Burned Grey:
- Complete Chapter 1 by following the steps for the Damsel path.
- Before entering the basement, take the blade.
- Make whatever choices you want, then slay the Princess.
Both versions of the Grey tell a sorrowful story about the tragic, neverending cycle of violence between you and the Princess.
The Drowned Grey, as the haunting spirit of the Prisoner, becomes resentful towards you for killing her, keeping you at a distance. She wears a funeral dress, representing the loss of trust.
The Burned Grey, as the ghost of the Damsel, still loves you and wears a wedding dress, but her love is twisted and distorted into a desire to kill you so that you can be together in death.
Epilogue: Happily Ever After

Despite the Narrator demanding that you slay the Princess, you do the exact opposite and rescue her, becoming the dashing hero she thought you were. And like any story with a Hero and a Princess, you two live happily ever after.
Or at least, that’s how it should’ve been. If you want to see what could be between you and the Princess, here are the steps to reach the Epilogue:
- Follow the steps in Chapter 1 to get to the Damsel.
- Before entering the basement, leave the blade.
- Make whatever dialogue choices you want, then rescue the Princess.
- When she asks what you want to do, say, “We leave. And then we have our whole lives to figure out what we want to do next.”
- Leave the basement with the Princess. When prompted, don’t slay the Princess.
- Just before you leave the cabin, say “All we need to be happy is each other, what if we just stayed here and built a life together?”
- The Princess doubts your resolve. “Trust me. It’ll be better for both of us if we stay. We can be happy here. We just have to want it.”
- You open your heart to her. Literally. Everything goes dark, and you die.
Alternatively, this other path will still have the same scene, but will give you the Voice of the Paranoid. You may access this option via the following:
- Starting from step 3 of the above, choose (Explore) “What do you want to do?”
- Pick (Explore) options three more times. Like a true people-pleasure, the Princess just wants to make you happy, her form devolving into crude sketches.
- Right before things take a turn for the worse, pick “Okay. Clearly something is happening here, and I’m very scared…” The Princess will revert to her normal self, confused by your request.
- The Voice of the Smitten will then open your heart to her. Literally. Everything goes dark, and you die.
As the only “Epilogue” of the game, this chapter describes a seemingly idyllic life that you and the Princess have set up for each other. Everything is perfect. Forever. But look deeper within. Is this what you both really wanted?

RELATED
9 Amazing Modern Text-Based Games
Looking to explore identity, tackle AI ethics, or sail dark seas? Here are nine modern text-based games to consider for your next adventure.

Slay the Princess

- Released
- October 23, 2023
- Developer
- Black Tabby Games
- Publisher
- Black Tabby Games
- Engine
- ren’py
- ESRB
- nr
- How Long To Beat
- 4 Hours
- How Long To Beat (Completionist Runs)
- 13.5 Hours
- OpenCritic Rating
- Mighty