
When you spot a leak in the ceiling it is always worrying not being able to see what the root cause of the problem is. Water leaks can cause a lot of collateral damage not just from the immediate effects of the leak damage but also from the breakage that has to occur in order to find the source of where the leak is coming from and then from any subsequent remedial actions.
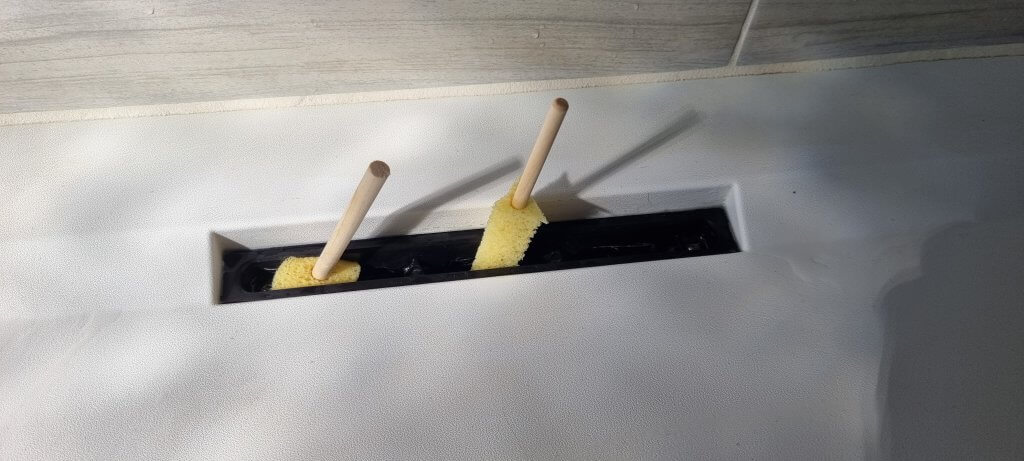
We spotted a small dark patch in the ceiling and on inspection it appeared to be soft to the touch and the drywall underneath the paint was black. The only way to find out where the leak was coming from was to cut out a small hole around the area of the leak and pull the affected drywall down.
Finding the leak
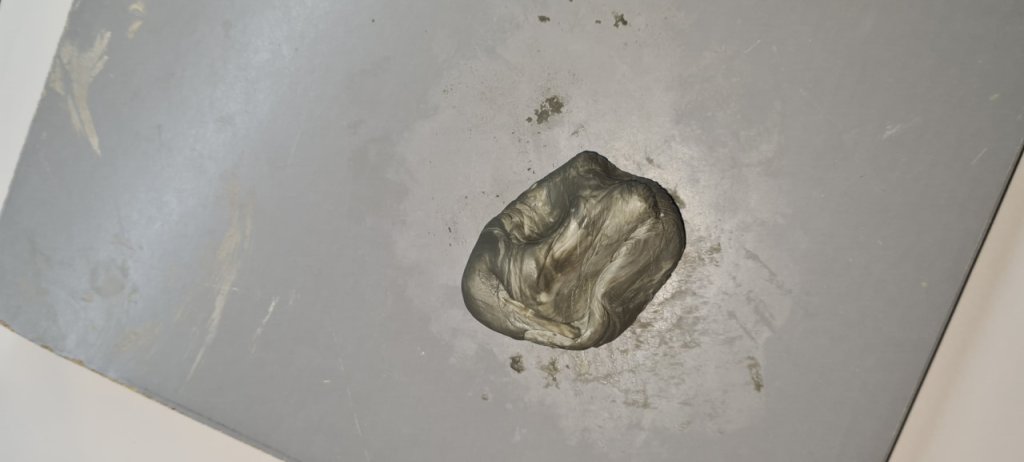
Removing the drywall around the wet patch in the ceiling revealed the waste pipe in the ensuite shower room that carries the grey water away from the sink and the shower cubicle had a tiny drip from a pinhole leak on the underneath of the pipe
The drip was emanating from an original joint that was plumbed when the house was built. The pipe that had the leak was attached to more recent plumbing that drains the shower tray and the vanity unit sink.
It was evident that cutting the pipe back from the original joint would take it beyond the exit from the hole in the composite I-Beam joist and also it would put undue stress on the other joints that connected to the slot drain in the shower tray. This stress may lead to breakdowns in the upstream joints leading to further failures and leaks. Re-plumbing the upstream pipework would mean pulling up the shower tray which would also entail removing the first row of tiles from around the shower tray. All in all a lot of work.
Two part epoxy putty
With this in mind a decision was made to attempt an in-place fix to the existing pipe joint that would not disturb any of the surrounding pipework. There are some excellent two part epoxy repair putty products on the market that facilitate an in-place repair with rapid curing times and even claim to activate and cure in a wet environment.
Joint preparation
The pipe joint was cleaned up and the area around the joint was roughed up with some sandpaper ready to make it a good surface for the two part epoxy putty to bind to that will be used to seal the joint.
A flexible drain rod with a small ball of wool tied very securely (we don’t want the wool falling off and going into the waste system) to the end of the rod was pushed down the waste pipe from the shower drain in order to remove any possible sludge from around the joint and also to help remove any excess water in the pipe. Then a hairdryer on medium heat was used to gently heat the pipe before and after the joint in order to get rid of any residual water left in the pipe.
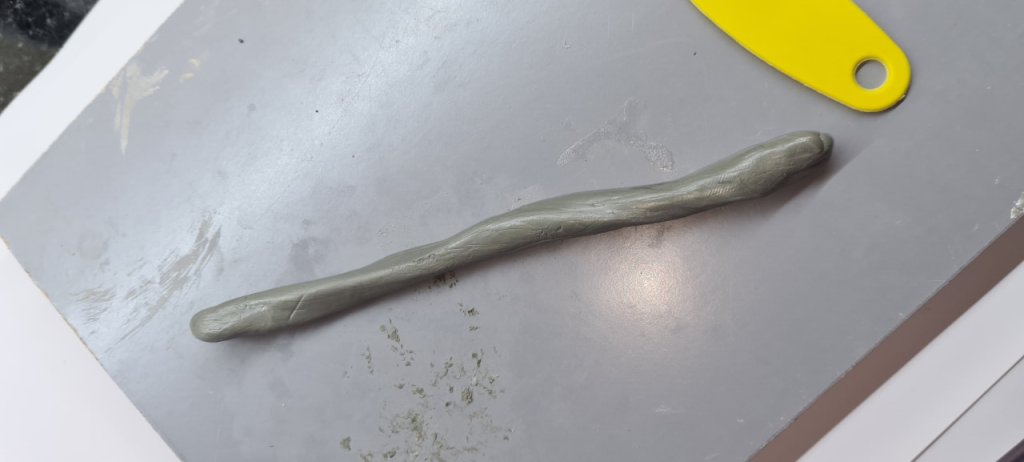
After a couple of hours the drip had ceased from the pipe. The pipe was given one last clean-up with some Isopropanol solution to make sure the surfaces were free from grease. The two part epoxy repair putty was cut to two equal chunks and then kneaded together until a uniform grey colour was created.
Applying the putty
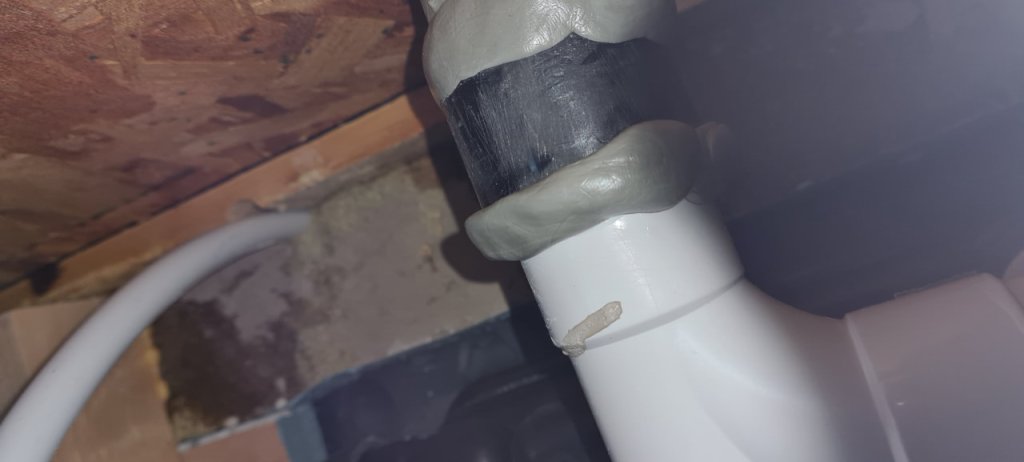
The putty was extruded into a thin sausage like shape that roughly matched the circumference of the pipe and placed around the leaky pipe joint. It was pressed in place around the joint making sure the putty fully filled the joint gap and was securely adhering to the pipe surface on either side of the joint.
Although the two part epoxy putty that we used said that it could be applied in a wet situation we left it 24 hours before using the facilities connected to the repaired pipe as this allowed the putty to attain maximum curing strength.
Making good
After 24 hours the joint proved to be fully watertight and all that was left to do was to create some thin battens to go across the drywall and cut a piece of drywall to match the size of the hole. This was then glued in place on the battens and the holes filled and skimmed over with plaster. Once the plaster was dry a coat of primer and then a final top coat of paint was applied, job done!