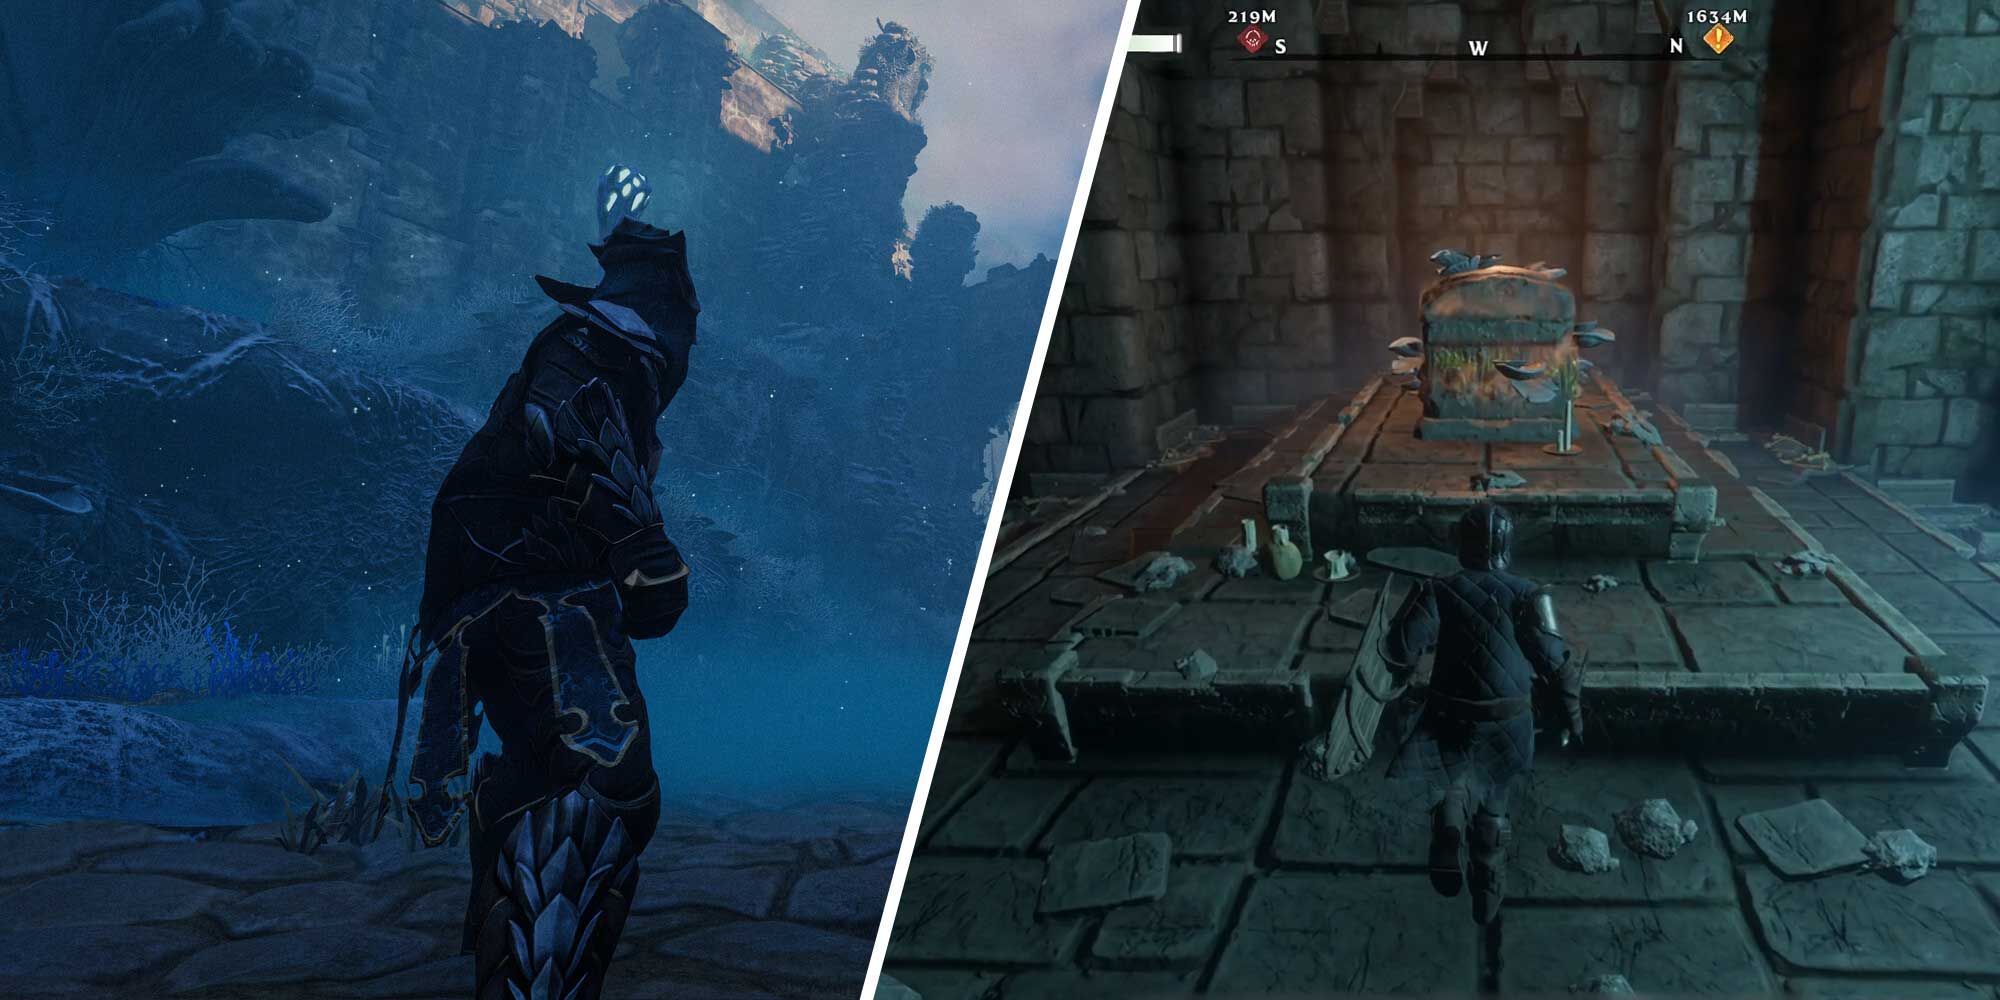
The Queen’s Tomb is one of the side quests in Enshrouded that will help you get a very special shield with a Pikemead design, but before you can lay your hands on this valuable loot, you need to search the entire tomb to find and activate four levers that will open the main gate to access the treasure.
Enshrouded: Carpenter Location And Vault Guide
Who needs more decorations?
While we will go over solving this puzzle, there is also quite an easy way to pick up the shield without activating the levers, though that will require you to collect some explosives before heading towards The Queen’s Tomb.
Enshrouded
- Released
- January 24, 2024
The Queen’s Tomb Location
Unlike what the name of the side quest calls it, the location is marked as Mistbury Catacombs on the map, which can be found northeast of Springlands and southwest of Revelwood Fast Travel Points. If you have already discovered the Hill of Scavengers, then you have an easy path to find Queen’s Tomb as it’s located just to the north of the hill.
The tomb itself is deep inside a cave, but the entry is visible from the east side of it with a locked wooden door that you can either break or lockpick.
How To Complete The Queen’s Tomb
Without Activating Levers
If you head inside the tomb, you will find the main gate at the far end of the corridor, which is a locked iron door. Before doing anything, make sure to kill the archer as well as the floating creature that will follow you. Now, all you need is around 8 to 10 Explosive Powder Bombs to throw at the iron gate to significantly decrease its health bar. If the door is not destroyed yet, go ahead and start dealing melee damage to the gate, and it should collapse within less than a minute.
While you can do this by dealing melee damage from the beginning, that would take much longer. Each Explosive Powder Bomb deals 50 damage to the gate, and when you throw 8 of them at the door, this already deals 400 damage.
Dealing this amount of damage with a mid-tier melee weapon that can only deal up to 10 damage per swing will not be efficient, though you can still do it.

Enshrouded: How To Upgrade Backpack
You can carry more!
How To Solve The Queen’s Tomb Puzzle

If you don’t have enough explosive bombs, or you don’t want to ruin the experience, here is how to solve the puzzle. The four levers are well-hidden inside the tomb, and you will have to search the area with open eyes to locate them. Before we continue, make sure that you have a bow with a few arrows or a wand with a few ice or fire bolts. Also, you are highly suggested to carry at least one lockpick.
First Lever Location
As soon as you enter the tomb, turn right and head upstairs from the first branch of the main corridor. Kill the enemies here and then stand at the edge of the wooden floor, where you can spot a grappling lock on the ceiling. Swing to the other side and take the stairs to your right. Once you are at the top of the balcony, look straight ahead, and you should be able to spot the first lever. Shoot the glowing sign with an arrow or a bolt to activate the first lever.
Second Lever Location
Head back to the main corridor again, and this time, head down the stairs from the far right branch of the corridor. You will spot a floating enemy that should be killed with a wand or a bow, as dealing melee damage to her is quite difficult. Once dead, head downstairs and turn right. Get down from the terrain until you see a magma river. Continue straight and jump over the magma river toward the dead end. If you look to your left, you can see the second lever on the wall. Shoot at it to disable the next lock.
Third Lever Location
Return to the foot of the stairs you came down, and you should spot a wooden door in front of the stairs. Break it open and head forward where you will spot a pile of Shroud terrain. Dig through it to reveal the path behind it. Head inside and turn right at the end of it. Use the ladder network on the wall to reach the other side, where you will spot another pile of Shroud terrain with an explosive barrel in front of it. Shoot at the barrel, and an entry to the Shroud zone will be revealed. Get inside, take the stairs up, kill the enemies, and you will find the third lever on the wall.
Fourth Lever Location
Return to the main corridor of the tomb again, and this time, head upstairs from the far left branch, which will lead you to an iron door. This is where you should use your lockpick, as breaking it open could take a bit longer than normal. Head through the door and turn left. Go up from the ladder then stand at the edge on your right. Swing to the other side using your Grappling Hook, and as soon as you land, you will find the final lever in front of yourself on the wall. Activating the final lever will open up the main gate, and you can grab Pikemead’s Bulwark from the tomb.

Enshrouded: Farmer Location And Vault Guide
Solve the puzzle to free the farmer!